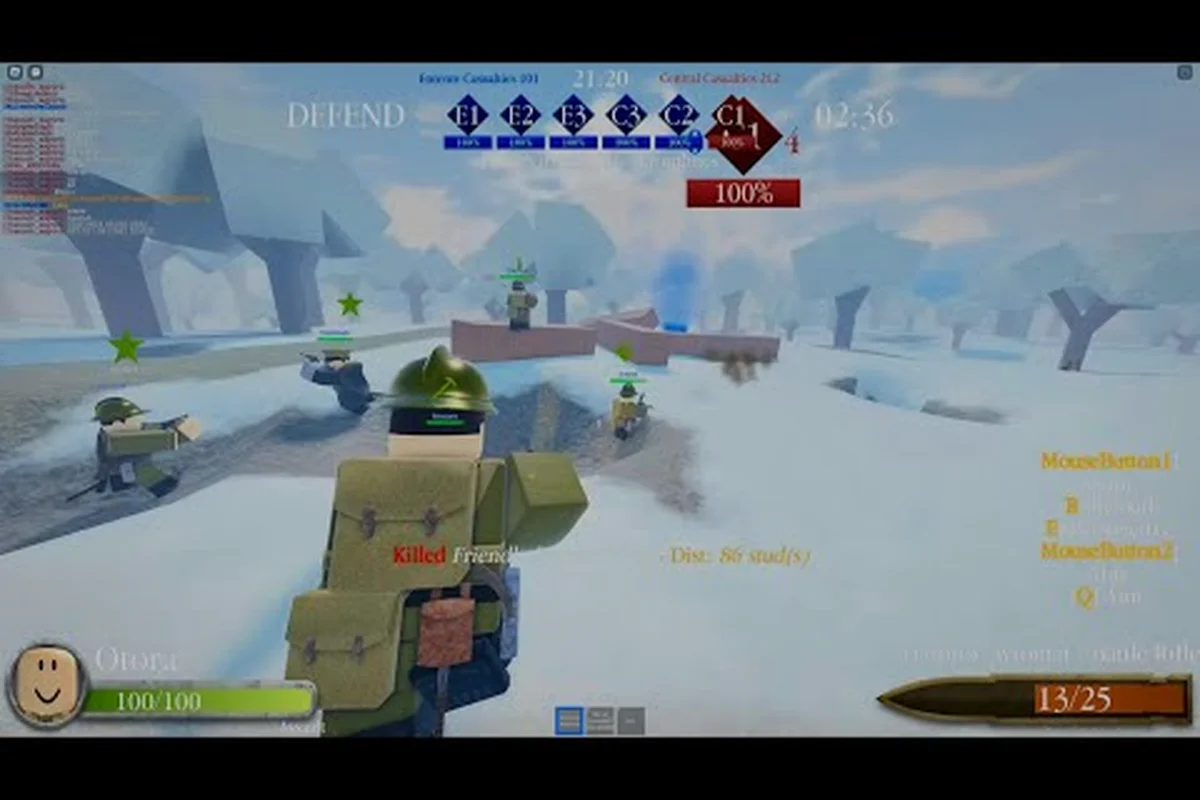
Conquest in ENTRENCHED is a perpetual attack-and-defense mode where the Central Powers and the Entente fight over a chain of capture points, and knowing the entrenched conquest maps is the difference between holding a line for twenty minutes and losing it in twenty seconds. The mode rewards teams that understand map geometry, sightlines, and the natural flow of reinforcements, because a squad that knows where the enemy will funnel can hold a position with half the numbers. This breakdown covers every conquest map's size, the choke points that decide each engagement, and the fortress positions that turn a good defense into an unbreakable one, so you can plan your next push with actual map knowledge instead of guesswork.
The core of conquest is simple: capture and hold more objectives than the enemy to drain their ticket count, but the entrenched map size and layout determine how that plays out. Small maps like Eisstadt force constant close-quarters brawls, while sprawling maps like Verdun reward flanking squads and long-range fire. Understanding these differences matters because your class choice, loadout, and squad composition should change based on the map you are fighting on, and the players who adapt their approach to each map consistently outperform those who run the same strategy everywhere.
Conquest Map Size and Layout Breakdown
The entrenched conquest maps vary dramatically in scale, and that size directly influences how many players you need to hold a sector, how long reinforcements take to arrive, and which classes thrive. Based on community testing and the official ENTRENCHED Roblox game page, the current rotation includes maps loosely based on early 20th century battlefields, with each one offering a distinct flow for the perpetual attack-and-defense format.
| Map | Relative Size | Primary Terrain | Best Classes | Match Pace |
|---|---|---|---|---|
| Verdun | Largest | Open fields, deep trench networks | Sniper, Scout, Machine Gunner | Slow, methodical |
| Eisstadt | Smallest | Urban ruins, tight streets | Assault, Flamethrower, Medic | Fast, chaotic |
| Doiran | Medium | Hillside slopes, fortified ridges | Support, Officer, Rifleman | Balanced |
| Fortress | Medium-Large | Bunker complexes, long sightlines | Machine Gunner, Sniper, Support | Defensive |
The entrenched map size matters most for your spawn strategy. On large maps like Verdun, dying at the frontline means a 15-20 second walk back, so reckless pushes get punished hard and medics become essential for keeping pressure on a point. On Eisstadt, the short respawn distance means teams can afford aggressive trades, and the pace of the match accelerates accordingly. Community reports suggest that Verdun conquest matches routinely run 30-40 minutes, while Eisstadt games often wrap up in under 15 because the constant close-range fighting burns tickets at a much faster rate.
Map rotation also plays a role in how you should prepare. The v1.23 update added Eisstadt with map weather variation, which means visibility and sound cues can shift mid-match, and the same map can play differently depending on the conditions. Rain reduces long-range visibility, which weakens snipers and strengthens close-range classes, while clear weather favors the entrenched sniper spots that dominate open sightlines.
Key Choke Points on Each Conquest Map
Choke points are the natural funnels where the map geometry forces attackers into narrow approaches, and controlling them is the fastest way to stall an enemy push. Every entrenched conquest map has at least two or three of these critical zones, and the teams that pre-aim them with machine guns and snipers make the attackers pay for every meter of ground. Controlling them is the fastest way to stall an enemy push, and learning how to exploit these kill zones from the defender’s side is a core part of our breakdown of Entrenched Map Flanks, where you can see how to turn those same chokepoints into your own staging ground. Every entrenched conquest map has at least two or three of these critical zones, and the teams that pre-aim them with machine guns and snipers make the attackers pay for every meter of ground.
Verdun Choke Points
Verdun's trench network creates a series of zigzag corridors that force attackers to expose themselves at predictable angles. The Sunken Road is the most notorious choke on the map, a sunken lane with high banks on both sides that offers only two entry points, both of which can be covered by a single machine gunner. The Ridge Line is the second major choke, a narrow crest that separates the two main trench systems, and holding it with a sniper team can deny the enemy access to the central objective for the entire match.
Eisstadt Choke Points
Eisstadt's urban layout creates street-level funnels between collapsed buildings and rubble piles. The Market Square is the primary choke, a wide open area surrounded by three entry streets that all converge on the central capture point, which makes it a killing field for anyone trying to push through without smoke cover. The Railway Cutting is the secondary choke, a narrow trench-like depression that runs along the map edge, and it offers the only safe flanking route to the enemy spawn, so controlling it gives your team a permanent pressure valve.
Doiran Choke Points
Doiran's hillside terrain creates elevation-based chokes where attackers must climb into defended positions. The Switchback Path is the main approach to the fortress objective, a series of hairpin turns that expose climbers to fire from above at every corner. The Gully is the alternative route, a steep ravine that offers cover but funnels attackers into a single file line, making it a deathtrap if the defenders have a flamethrower or support player with explosive ammunition.
| Map | Primary Choke | Secondary Choke | Best Defense Position |
|---|---|---|---|
| Verdun | Sunken Road | Ridge Line | Machine gun nest at the road bend |
| Eisstadt | Market Square | Railway Cutting | Second-floor window overlooking the square |
| Doiran | Switchback Path | The Gully | Bunker at the switchback crest |
| Fortress | Main Gate | Breach Wall | Interior courtyard with overlapping fields of fire |
Understanding these entrenched map choke points lets you position your squad before the enemy arrives, and the difference between a prepared defense and a reactive one is often the difference between holding and losing an objective. The best teams assign one player to watch each choke and call out enemy movements, because a single warning can give your machine gunner the time to reposition and lock down the approach.
Best Fortress Positions and Defensive Lines
The fortress map is the most defensible layout in the rotation, and knowing the strong positions turns it into a grind for the attacking team. The Main Gate is the obvious entry point, but it is also the most heavily defended, with sightlines from three different elevations that can trap attackers in a crossfire. The Breach Wall is the alternative entry, a section of the perimeter that can be destroyed by explosives, but it opens into a narrow courtyard that defenders can lock down with overlapping fields of fire.
The Interior Courtyard is the fortress's heart, a central open area surrounded by elevated walkways and bunker entrances. Holding the walkways gives your team complete control of the courtyard below, and a single support player with a machine gun can deny the entire open space. The Command Bunker is the final fallback position, a reinforced room with only two entrances, both of which can be covered by a single defender, and it is the last stand position when the fortress is about to fall.
For the entrenched fortress map, the best defensive strategy is a layered defense that gives ground slowly while inflicting maximum casualties. The first line holds the Main Gate approach, the second line falls back to the Breach Wall courtyard, and the final line makes the attackers fight for every meter of the Command Bunker. This approach trades space for time, and it gives your reinforcements time to arrive and counter-push before the objective falls.
Sniper Spots and Long-Range Positions
The entrenched sniper spots are the positions that give you clear sightlines over the map's major approaches, and they are the difference between a sniper who gets one or two kills per life and one who dominates the match. The best spots are elevated, have cover to break line of sight when you need to reload, and offer a view of at least two different approaches so you are not a sitting duck after your first shot.
Verdun Sniper Positions
Verdun's Ridge Line is the premier sniper position on the map, offering a view of the entire central trench system and the Sunken Road approach. The Church Tower is the secondary position, a ruined building with a clear sightline over the eastern trench network, but it is a known spot, so expect counter-snipers to pre-aim it. The Crater Rim is the sneaky position, a shell crater on the western edge that offers a low-profile view of the enemy reinforcement route.
Eisstadt Sniper Positions
Eisstadt's Clock Tower is the dominant sniper position, offering a 360-degree view of the Market Square and both main approach streets, but it is also the most obvious spot on the map, so you need a spotter to watch your back. The Roof Tops are the alternative positions, a series of connected rooftops that let you move between firing positions without exposing yourself at street level. The Rubble Pile near the Railway Cutting is the sneaky position, offering a low-profile view of the flanking route that most teams ignore.
| Map | Primary Sniper Spot | Visibility | Risk Level |
|---|---|---|---|
| Verdun | Ridge Line | Full trench network | Medium |
| Verdun | Church Tower | Eastern trenches | High |
| Eisstadt | Clock Tower | Full Market Square | High |
| Eisstadt | Roof Tops | Street approaches | Medium |
| Doiran | Summit Bunker | Fortress approach | Low |
The entrenched sniper spots on Doiran are more limited because of the hillside terrain, but the Summit Bunker offers a protected position with a clear view of the Switchback Path, and the Rock Outcrop on the eastern slope gives a flanking angle on the Gully approach. The key to effective sniping on any map is position rotation — never fire more than two or three shots from the same spot, because experienced players will triangulate your position and send a scout or assault player to flush you out.
Conquest vs Domination Map Differences
While conquest and domination share the same map pool, the entrenched domination maps play differently because the objective format changes the flow of the match. Domination uses a king-of-the-hill format where a single central point is contested, which means the map's geometry matters less for flanking and more for controlling the approaches to the central objective.
| Mode | Objective | Map Flow | Key Difference |
|---|---|---|---|
| Conquest | Multiple capture points | Spread out, flanking heavy | Map size matters most |
| Domination | Single central point | Concentrated, brawl heavy | Choke points matter most |
In domination, the entrenched map choke points become even more important because every route leads to the same central objective, and the team that controls the chokes controls the point. The fortress map is particularly brutal in domination because the central point is the Interior Courtyard, and the defending team can lock down all three entry routes with overlapping fire. The smaller maps like Eisstadt favor domination because the short distances keep the action constant, while the larger maps like Verdun can feel empty if both teams commit to defending their approach routes instead of pushing the point.
The class meta also shifts between modes. In conquest, the spread-out objectives favor mobile classes like Scout and Assault who can rotate between points, while in domination, the concentrated fighting favors Support and Machine Gunner who can hold a single position. The entrenched domination maps reward teams that bring more firepower and fewer flankers, and the teams that adapt their composition to the mode consistently win more matches.
Frequently Asked Questions
What is the best entrenched conquest map for beginners?
Eisstadt is the best map for beginners because its small size means shorter respawn walks and more frequent engagements, which lets new players learn the combat mechanics faster. The urban terrain also offers plenty of cover, so you are less exposed to long-range fire while you are still learning the movement and aiming systems.
How do I defend a choke point effectively?
Position a machine gunner with a clear sightline down the approach, place a support player behind them with ammunition resupply, and have a medic nearby to keep both alive. Add a sniper watching the flanks to prevent flanking attempts, and communicate enemy movements so your team can react before the push reaches your position.
Which class is strongest on the fortress map?
The Machine Gunner is the strongest class on the fortress map because the interior courtyard and narrow corridors create perfect firing lanes for suppressive fire. A well-positioned machine gunner can deny an entire approach route, and with a support player resupplying ammunition, they can hold a position indefinitely against waves of attackers.
Do conquest maps rotate with weather conditions?
Yes, the v1.23 update added map weather variation to Eisstadt, and community reports suggest the weather system is being expanded to other maps. Rain reduces visibility and muffles sound cues, which weakens snipers and strengthens close-range classes, so check the weather conditions at the start of each match and adjust your class choice accordingly.
How many players do I need to hold a conquest point?
You need at least three players to hold a point effectively: one to watch the main approach, one to watch the flank, and one to provide fire support or medical backup. With fewer than three, a coordinated enemy push will overwhelm you, and with more than five, you are wasting manpower that could be securing other objectives on the map.