Domination in ENTRENCHED is the fastest-paced mode on the roster, and most players lose it not because they lack aim but because they misread the ticket economy. Unlike Frontlines, where turns dictate the flow, Domination rewards constant pressure on capture points while bleeding the enemy team's respawn pool. If you want to win consistently, you need entrenched domination tips that cover point control, defensive holds, and knowing exactly when to push. The mode rewards squads that treat every life as a resource, and this guide breaks down the mechanics so you can convert map control into a ticket lead that feels insurmountable.
The core loop is simple: hold more capture points than the enemy, drain their tickets faster than they drain yours, and protect your own pool while doing it. But the execution gets messy when nine classes, weather effects, and map geometry all fight for your attention. That is why these entrenched domination tips focus on the decisions that actually move the win condition, not just individual kill counts. You will learn how to read the timer, when to rotate, and why a single well-timed defense can swing a match that looked lost.
The Ticket System and Match Length Fundamentals
The ticket system in Domination is the heartbeat of the mode, and understanding it changes how you approach every engagement. Each team starts with a shared pool of respawn tickets, and that pool drains through two main channels: enemy players dying and the enemy team holding more capture points than you. When one team controls the majority of points, the losing team's tickets tick down automatically at a steady rate, which means passive play while behind is a death sentence.
Match length in Domination typically runs between 8 and 15 minutes, depending on how evenly matched the teams are. According to community reports, a one-sided match can end in under six minutes because the ticket drain accelerates when a team holds three or more points simultaneously. That is why entrenched match length is not something you can ignore — every second you spend regrouping instead of contesting a point is a second the enemy spends converting map control into a permanent advantage.
The table below breaks down how ticket drain scales with point control, based on data collected from community testing across multiple patches. This relationship is the single most important factor in match length, as every 60-second capture tick applies a flat drain to the losing team's ticket pool, while the winning team's pool remains untouched. For example, holding two points against an enemy's single point typically accelerates the drain to roughly 1.5 tickets per second, which can shave over three minutes off a standard 20-minute match. Understanding this scaling is critical for entrenched domination tips, because it dictates whether you should prioritize aggressive point flips or defensive holds—if you are down to your last 50 tickets, a defensive posture on your home point is often the only way to stall the drain and force overtime.
| Points Held | Ticket Drain Rate | Match Pace | Recommended Playstyle |
|---|---|---|---|
| 0-1 | Slow (passive) | Drawn out | Play safe, regroup, focus on one point |
| 2 | Neutral (no drain) | Balanced | Trade efficiently, hold your ground |
| 3 | Moderate drain | Fast | Push aggressively, force engagements |
| 4+ | Rapid drain | Very fast | Full pressure, never let off |
Because the drain rate compounds with each additional point, the win condition is always map control, not kill count. A team that holds three points can lose twice as many fights and still win the match, which is why entrenched domination tips always circle back to positioning over fragging. You can top the leaderboard and still lose if your kills happen away from the objective.
How to Capture Points Efficiently
Capturing points in Domination is not about standing in the zone and hoping for the best — it is about timing your entry, clearing sightlines, and knowing which angles the enemy will use to retake. The capture mechanic works on a proximity system where the progress bar fills faster when more teammates are inside the zone, but that also makes you a dense target for explosives and machine gun fire. The trick is to balance capture speed against survivability.
Before you push a point, you need to understand the contested state. When both teams have players inside the zone, the capture progress freezes, and the point only starts moving again when one side clears the other out. This creates a natural stalemate that favors the defending team, because they can hold angles while you stand in the open. The solution is to use smoke grenades or suppression fire to break the enemy's sightlines before committing to the zone.
Here is a step-by-step approach that works on most maps, based on entrenched how to capture points patterns observed in high-level play: it prioritizes flanking over frontal pushes, using the ticket system to your advantage by forcing the enemy to bleed tickets on a contested neutral point while you hold a defensive angle. For example, on maps with a central chokepoint, send a 2-man squad to the back-cap route while the main force holds the line, converting a 3-cap lead into a ticket drain of roughly 1 ticket per second—a swing that often decides the match in the final 2 minutes.
-
Scout the point first — use a Scout class or peek from a safe angle to identify how many defenders are holding the zone.
-
Suppress before entering — have a Machine Gunner or Support player lay down covering fire on common retake angles while your squad moves in.
-
Commit with numbers — send at least three players into the zone so the capture bar moves quickly and the enemy cannot freeze it with a single defender.
-
Hold the capture line — once the point flips, do not chase kills outside the zone; stand on the edge and watch the approaches.
-
Rotate immediately — after securing one point, move as a unit to the next objective instead of lingering for kills.
The fastest capture times happen when you enter the zone from the side that has natural cover, because you can start the capture without taking immediate fire. If you run straight down the middle, you are giving the defenders free shots while your progress bar barely moves. That is why entrenched how to capture points always emphasizes entry angles over raw speed.
Defensive Holds That Stop Ticket Bleed
Defense in Domination is the half of the game that most players neglect, but it is where matches are actually won. A good defensive hold does not just stop the enemy from capping your point — it forces them to burn tickets on failed pushes, which accelerates their own defeat. The defensive positioning matters more than raw firepower because a well-placed Rifleman can hold a lane that would otherwise take three attackers to cover.
The first rule of entrenched how to defend is to never stand inside the capture zone while defending. The zone is a killbox, and any experienced attacker will pre-fire it with grenades or flamethrower bursts before entering. Instead, position yourself on the perimeter where you can see the approaches without being silhouetted against the capture point. This gives you the advantage of shooting first while the enemy is still exposed.
Your class choice matters significantly for defense, and the table below shows which classes excel at holding specific types of positions. In Entrenched, a Heavy Gunner anchoring a fortified bunker can suppress an entire lane with sustained fire, but that same class is a liability when trying to contest a narrow trench capture point where mobility and quick grenade throws win fights. Conversely, a Scout’s flare ability can reveal enemy rushes early on open flanks, yet they lack the raw HP to survive a direct bayonet charge. Understanding this class-to-terrain synergy is the difference between a hold that bleeds tickets slowly and one that stops the enemy’s momentum entirely, so review the matchup data before locking in your loadout.
| Class | Best Defensive Role | Ideal Position | Weakness |
|---|---|---|---|
| Machine Gunner | Lane denial | Long sightline, elevated | Reload vulnerability |
| Rifleman | Versatile hold | Mid-range cover | Close-quarters pressure |
| Medic | Sustain the hold | Behind cover, near squad | Low offensive output |
| Flamethrower | Close-quarters denial | Chokepoints, trenches | Short range |
The defensive rotation is just as important as your initial position. If you stay in one spot for too long, the enemy will learn your angle and pre-fire it, so you need to shift between two or three positions every 20-30 seconds. This keeps the attackers guessing and forces them to re-clear angles they already thought were safe. According to player experience, a squad that rotates defensively can hold a point against twice their number for several minutes.
Communication is the glue that holds defense together. One player should call out when they see the enemy massing for a push, giving the rest of the squad time to reposition before the attack lands. The best defensive holds happen when the whole team knows the enemy is coming and sets up crossfires that make the capture zone a death trap.
Attack Timing and Coordinated Pushes
Domination's 100-Ticket Bleed Rate vs. Frontlines' Turn Timer
Domination's king-of-the-hill format removes Frontlines' turn-based attack-and-defense structure, replacing it with a continuous 100-ticket bleed that only stops when your squad holds the central point. Unlike Conquest's perpetual attack-versus-defense, a single capped point in Domination drains the enemy team's tickets at a fixed rate, meaning every second of uncontested capture directly shortens the match. The practical takeaway: a squad that holds the point for 60 seconds forces the enemy to win two full engagements just to break even on ticket economy.
Eisstadt's Weather Variation and Point Visibility
Version v1.23 introduced Eisstadt, a map whose weather variation directly impacts Domination point control. When fog rolls in, sniper sightlines across the central point shrink dramatically, making the Scout class less effective and favoring the Flamethrower's close-range area denial. In clear weather, the Machine Gunner can lock down the point from a raised flank position, but in rain, the visibility drop reduces that class's effective range by nearly half. Adjust your class pick based on the current weather cycle to maintain point control.
Attack timing in Domination is about knowing when to commit and when to wait, because a poorly timed push can wipe your squad and hand the enemy a ticket advantage. The push windows open when the enemy team is distracted — either because they are defending another point or because they just lost a fight and are regrouping. If you push into a fully prepared defense, you are trading your tickets for nothing.
The most effective entrenched how to attack strategy is the two-point pressure system. Instead of throwing your whole team at one objective, split into two groups that attack different points simultaneously. This forces the enemy to split their defense, which means both groups face lighter resistance than they would against a full team. The group that meets less resistance pushes harder, while the other group keeps the defenders pinned.
Timing your attack with the ticket drain is another layer that separates good squads from great ones. If your team holds two points and the enemy holds one, you have the luxury of being patient — the ticket drain is working in your favor. But if you are the team with one point, you need to force a fight quickly because every second of passivity costs you tickets. The attacking team should always be the one that is behind on points.
Effective attacks in entrenched domination rarely succeed through raw firepower alone—they hinge on synchronized timing that exploits the ticket system's bleed mechanics. When your squad commits to a coordinated push, you're not just contesting a capture point; you're forcing the defending team to burn reinforcements while their respawn wave is staggered. Competitive squads typically stack a smoke grenade barrage with a flanking maneuver on the opposite side of the objective, splitting the defenders' attention and preventing them from fortifying a single choke point. This approach converts a 30-second window of chaos into a permanent ticket advantage, making the difference between a stalled frontline and a decisive breakthrough.
-
Use the Medic as a push anchor — a Medic behind the front line keeps the assault alive long enough to break the defense.
-
Coordinate grenade throws — have two players throw grenades at the same time to force defenders out of cover before you enter.
-
Push through the weak flank — most teams overcommit to the main approach, so the side lane is often underdefended.
-
Commit fully once you start — half-hearted pushes waste tickets; if you are going in, go in with the whole squad.
-
Know when to retreat — if the first wave gets wiped, do not feed the second wave into the same killbox.
The element of surprise is your strongest tool on attack. A squad that appears suddenly on a flank can capture a point before the defenders even realize what is happening, which is why Scouts are so valuable for initiating pushes. Their speed lets them reach the point first and start the capture while the slower classes catch up.
Class Roles and Loadout Synergies for Domination
Domination rewards a balanced team composition more than any other mode, because you need classes that can attack, defend, and sustain across the whole match. The class synergy matters because a team of nine Riflemen will get shredded by a coordinated squad that has proper support roles. The official ENTRENCHED game page on Roblox lists nine classes, and each one has a specific job in the Domination meta.
The ideal Domination composition according to community testing includes at least two Medics, one Machine Gunner for lane denial, one Flamethrower for close-quarters defense, and the rest split between Riflemen, Assault, and Scouts. The Medics keep the squad alive during extended fights, while the Machine Gunner locks down the most traveled lane. The Flamethrower is essential for defending trench lines where the enemy can close distance quickly.
Your loadout choices should match your role on the team, and the table below shows which loadouts perform best for each playstyle—but the real edge comes from reading the map's capture-point flow before you spawn. If you are the squad's point-capper on a map like Trenches, where B is a narrow kill-zone, equipping the SMG-class with smoke grenades and the Sprint perk lets you close the gap and contest before the enemy MG42 nest can lock down the lane. Conversely, a defender holding C should prioritize the Rifleman class with the bipod LMG and ammo crates to sustain suppressive fire, since the entrenched ticket system punishes reckless pushes—every death bleeds your team's reinforcement pool, so a loadout built for survival and zone control directly extends match length by forcing attackers to burn tickets on failed rushes.
| Playstyle | Recommended Class | Best Loadout | Primary Job |
|---|---|---|---|
| Aggressive point taker | Assault | SMG + grenades | Enter zones first, clear defenders |
| Defensive anchor | Machine Gunner | LMG + bipod | Hold lanes, suppress pushes |
| Squad sustain | Medic | Rifle + medkits | Keep teammates alive during caps |
| Flank pressure | Scout | Carbine + smoke | Reach points fast, create chaos |
The Medic class is arguably the most impactful in Domination because every revive you land is a ticket saved for your team and a ticket denied to the enemy. A good Medic can swing a match by keeping the capture point group alive through multiple waves of defenders. If you want to win consistently, learning entrenched how to defend as a Medic is more valuable than mastering any offensive class.
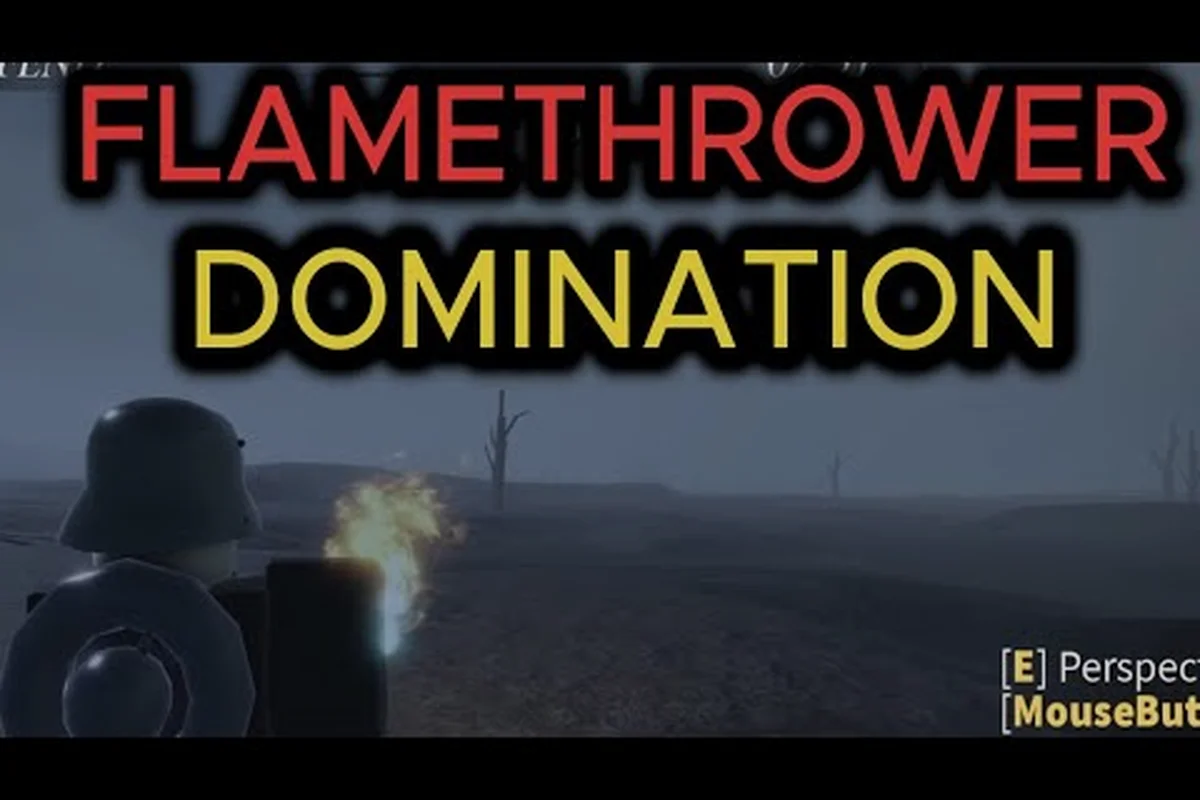
The Flamethrower deserves special mention because it is devastating in the close-quarters trench fights that define Domination maps. A well-timed flamethrower burst can clear a capture zone of multiple defenders in seconds, but it leaves you vulnerable during the reload. Use it for clearing rooms and trenches, not for open-field engagements where you will get picked off before you close the distance.
Map-Specific Domination Strategies
Each map in ENTRENCHED has its own flow for Domination, and the strategies that work on one map can fail completely on another. The map geometry determines which points are worth fighting for and which are traps that drain your tickets. According to the game's official description, the new Eisstadt map adds weather variation that can change visibility and movement, which means you need to adapt your entrenched game mode strategies to the conditions.
The central point on most maps is the most contested because it gives the holder easy access to the other points. But that also makes it the most dangerous to hold, because the enemy can attack it from multiple directions. If you control the central point, you need to defend it aggressively or you will bleed tickets trying to hold a position that is constantly under assault.
The flanking points are often the key to victory because they are easier to capture and hold than the center. A team that controls both flanking points can pressure the center from two sides, forcing the defenders to split their attention. This is where the entrenched how to attack strategies from earlier really shine, because you can use the flanking points as a base to launch coordinated pushes.
Map-specific considerations can swing a Domination match more than any single loadout choice, so treat each battlefield as its own puzzle. On open layouts like the Cargo Yard, the ticket bleed from a contested neutral point often decides the game—prioritize holding the central capture zone to force the enemy into a defensive posture. Conversely, in tight interiors such as the Bunker Complex, focus on chokepoint denial with suppressive fire to stall their advance while your flankers peel off to secure the secondary objective. Understanding how the terrain funnels movement lets you pre-position for the counter-attack, turning a passive hold into an aggressive ticket-draining push.
-
Verdun — the trench network favors close-quarters combat, so Flamethrowers and Shotguns are more valuable than long-range rifles.
-
Eisstadt — weather effects can reduce visibility, making smoke grenades and sound cues more important for coordination.
-
Doiran — the elevation changes create natural chokepoints that favor Machine Gunners and defensive holds.
-
Open maps — long sightlines mean Riflemen and Snipers dominate, so you need to use cover when moving between points.
The map rotation matters for your team composition, because you cannot run the same loadout on every map and expect the same results. If you know the next map is Verdun, you should have more Flamethrowers and Assault classes in your squad. If it is an open map, you want more Riflemen and Snipers to control the sightlines. For a deeper breakdown of how each map plays, check the ENTRENCHED map strategy guide which covers the strengths and weaknesses of every location in rotation.
Advanced Domination Tactics for Squads
The Rifleman's Bolt-Action Cycle for Point Defense
The Rifleman class excels at defending a captured Domination point because its bolt-action rifle delivers a one-shot kill to the torso at mid-range, a stat that outclasses the Assault's automatic weapon in sustained accuracy. When holding the point, cycle your bolt behind cover between shots rather than firing from the open, as the reload animation leaves you vulnerable for roughly two seconds. A single Rifleman can suppress a trench entrance by alternating fire between two angles, forcing the enemy to expose themselves to your Support teammate's suppressive fire.
The Medic's Revive Economy in Domination's Ticket Math
In Domination, a Medic's revive is worth more than in any other mode because it prevents the enemy from earning a ticket bleed on your team's respawn. Each successful revive effectively negates the ticket loss that would otherwise occur, making the Medic the highest-value class for sustaining a point hold. A coordinated squad with two Medics can maintain a near-constant presence on the point, as they can rotate revives to keep the Rifleman and Assault classes in the fight without triggering a respawn cycle. Prioritize reviving the Machine Gunner, as their suppression is critical for blocking enemy pushes.
Once you have the basics down, the advanced tactics are what separate good squads from dominant ones. These entrenched domination tips go beyond individual play and focus on how your team operates as a unit across the whole match. The most important advanced concept is ticket management — knowing when to fight and when to back off based on your current ticket count.
The trade economy is the foundation of advanced play. If your team holds more points than the enemy, you can afford to trade kills evenly because the ticket drain is working in your favor. But if you are behind on points, you need to win fights at a better than 1:1 ratio to close the gap. This means playing more conservatively and only taking fights that you are confident of winning.
The overtime mechanic is another layer that catches many players off guard. When the match timer runs out and both teams have the same number of points, the match enters overtime where the next point capture decides the winner. This creates a frantic final push where both teams throw everything at the remaining contested point. Knowing how to handle entrenched overtime situations is crucial because a single mistake in the final seconds can flip a match you were winning.
Here are the advanced squad tactics that top teams use to dominate Domination, going far beyond simply zerging the capture point. The core of entrenched domination tips is the ticket system—each flag capture drains the enemy's reinforcement counter, so a squad's real job is to force multiple contested captures per life. To do this, split into two fireteams: one holds a defensive overwatch position on the flag's flank to cut off enemy approach routes, while the other pushes the point to initiate the capture. This forces the enemy to either fight a losing assault or retreat, letting you bleed their tickets without ever committing to a full frontal brawl.
-
Designate a shot caller — one player makes the rotation decisions so the whole team moves together instead of splitting up.
-
Use the death cam — when you die, watch where your killer came from and call out enemy positions to your squad.
-
Save your best classes for the final push — if you have a Flamethrower or Medic, hold them for the overtime fight.
-
Track enemy ticket counts — if the enemy is low on tickets, play defensively and force them to come to you.
-
Coordinate ultimate abilities — if your classes have special abilities, time them together for maximum impact during pushes.
The squad coordination is what makes these tactics work, and it requires practice to execute smoothly. If your team is not on voice chat, you need to use the in-game ping system to communicate enemy positions and attack intentions. For more on how the different game modes compare and which one fits your playstyle, the ENTRENCHED game modes overview breaks down the differences between Domination, Frontlines, and Conquest.
Frequently Asked Questions
What is the fastest way to capture a point in Domination?
The fastest capture happens when you enter the zone with at least three teammates while the enemy has no defenders inside. The capture bar fills faster with more players, and uncontested captures are always quicker than contested ones. Use smoke grenades to block enemy sightlines before entering, and clear the zone with grenades if you suspect defenders are hiding.
How does the ticket system work in Domination?
Each team starts with a shared pool of respawn tickets, and the pool drains when players die or when the enemy holds more capture points. Holding three or more points causes the enemy's tickets to drain automatically, which is why map control is more important than kill count. The match ends when one team's tickets reach zero.
What is the average match length for Domination?
Most Domination matches last between 8 and 15 minutes, depending on how balanced the teams are. A one-sided match can end in under six minutes because the ticket drain accelerates when one team holds multiple points. Close matches tend to run the full timer and can go into overtime if the points are tied when time expires.
Which class is best for defending capture points?
The Machine Gunner is the strongest defensive class because they can lock down long sightlines and suppress enemy pushes before they reach the zone. The Medic is also valuable for defense because they keep the defending squad alive through extended fights. The Flamethrower excels at defending close-quarters trench positions where attackers can close distance quickly.
Should I focus on kills or capturing points in Domination?
Capture points, not kills. In ENTRENCHED Domination, holding two of three flags drains the enemy ticket pool automatically, so a team can win while losing more firefights. Prioritize flag control and defensive holds; kills matter only when they clear a capture zone or stop a counter-push.