
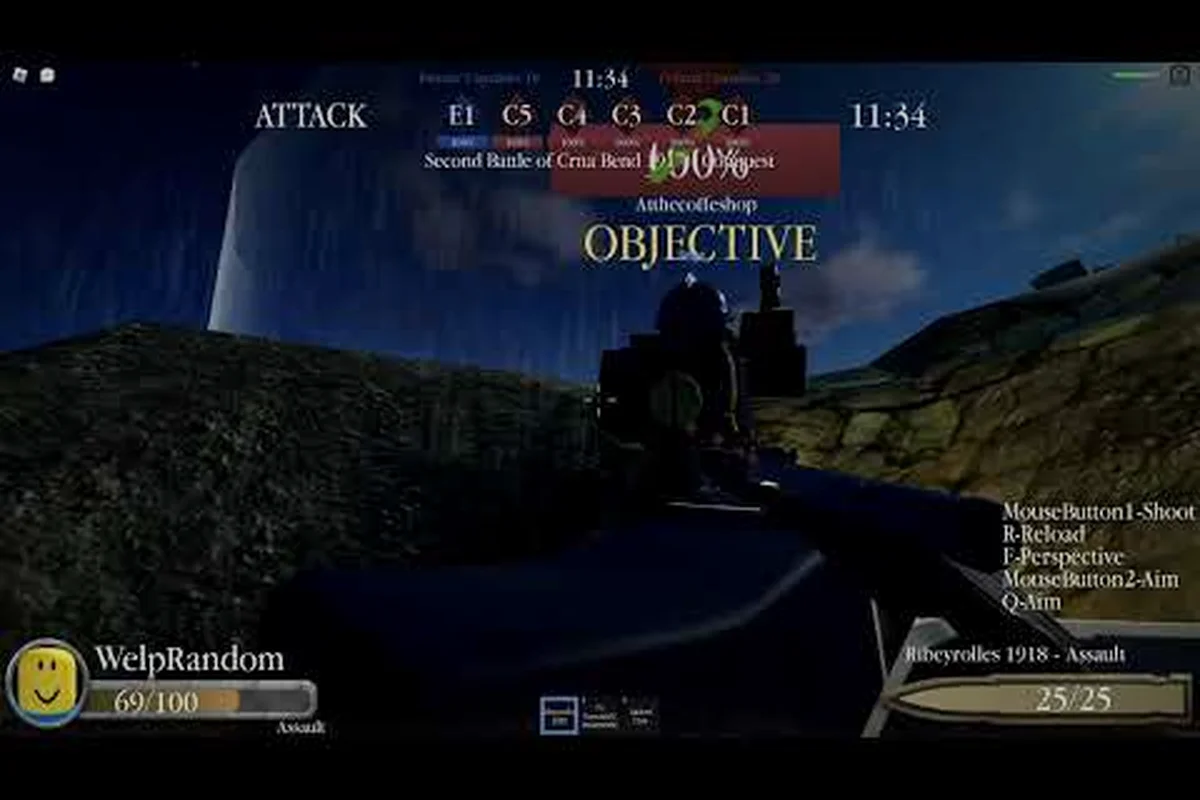
Getting your ENTRENCHED FOV settings dialed in is one of the fastest ways to improve your kill-to-death ratio in Roblox's WW1 shooter. Because the game throws you into chaotic trench warfare with up to 150 players, a wider field of view lets you spot flankers before they spot you, while a narrower one helps you land those long-range rifle shots. This guide breaks down the exact FOV numbers, crosshair configurations, class-switching mechanics, and respawn timing that competitive players use to dominate Frontlines and Conquest matches.
Why ENTRENCHED FOV Settings Matter More Than You Think
The default camera distance in ENTRENCHED feels comfortable for casual play, but it puts you at a measurable disadvantage when you're trying to track enemies moving between trench lines. Your effective awareness radius shrinks dramatically at low FOV values, which means a sniper perched on a ridge can take two or three shots at you before you even register their position on screen. According to community testing on the Roblox Developer Forum, players who increased their FOV by 20-30 degrees reported spotting enemies roughly half a second faster in open-field engagements, which is often the difference between winning and losing a duel.
The trade-off works in reverse too, because cranking your FOV too high distorts the image at the edges of your screen and makes distant targets appear smaller than they actually are. That distortion hurts your accuracy with bolt-action rifles, where pixel-perfect headshots matter more than peripheral awareness. The sweet spot depends on your primary weapon class and playstyle, but most veteran players agree that a mid-range value balances both priorities effectively.
FOV isn't just a cosmetic zoom slider—it directly alters your target acquisition speed and peripheral threat detection in Entrenched. A wider setting (90–100) lets you spot flanking enemies while defending an objective, but it shrinks the visual size of distant riflemen, making long-range iron-sight tracking harder. Conversely, a narrow FOV (70–80) magnifies targets for precise bolt-action shots, yet blinds you to close-quarters pushes. Your choice effectively trades situational awareness for accuracy, and this trade-off shifts depending on whether you're holding a sightline or storming a trench.
-
Target acquisition speed — wider views let you pick up movement in your peripheral vision sooner, which matters when enemies approach from multiple angles.
-
Aim precision at range — narrower views magnify distant targets, making it easier to line up shots on enemies holding defensive positions.
-
Motion sickness risk — extremely high FOV values can cause discomfort during prolonged sessions, especially on larger monitors.
-
Performance impact — higher FOV renders more objects on screen, which can lower your frame rate on older hardware.
If you are still working through the fundamentals of combat, the ENTRENCHED beginner guide covers the core mechanics you need before fine-tuning your settings. Jumping straight into FOV tweaks without mastering the base movement and weapon handling can mask bad habits, such as relying on a wider view to compensate for poor positioning. Instead, use the default 90 FOV to learn how to pre-aim down sight at common sightlines and manage your stamina during pushes. Once you consistently win those initial engagements, then start experimenting with values like 100–110 to widen your peripheral awareness without sacrificing target acquisition speed.
Optimal FOV Values for Every Playstyle
Close-Quarters Combat and Assault
Players who prefer the Assault class with its automatic weapons need a wider FOV because their engagements happen inside trenches and bunkers where enemies can appear from any direction. A value in the 75-85 range gives you enough peripheral vision to track multiple targets during a push while keeping the center of your screen clear enough for accurate hip-fire. The trade-off is that your long-range effectiveness drops, but that matters less when you are clearing objectives at close range.
Long-Range Marksman and Sniper
The Sniper class demands the opposite approach, because your entire value to the team comes from landing shots at distances where a few pixels of error mean a missed headshot. Players who main this class typically run 60-65 FOV to keep targets as large as possible on screen, even though this severely limits their situational awareness. You compensate by positioning yourself with your back to cover and relying on teammates to call out approaching enemies.
Balanced Infantry Rifleman
The Rifleman class sits in the middle of the engagement spectrum, so a balanced FOV value around 70-75 works best for most players. This setting keeps distant targets visible enough for accurate shooting while still giving you decent awareness of your immediate surroundings. It is the most forgiving option if you switch between offensive and defensive roles frequently during a match.
The table below summarizes the recommended starting points for each class, with values tuned for the default 90-degree FOV rather than the 103-degree competitive standard—a distinction that matters because your perceived sensitivity scales with horizontal resolution. For Rifleman, begin with a 0.35 ADS multiplier and 1.20 hipfire sensitivity, then adjust in 0.05 increments if your tracking feels floaty on the 4x optic. These baselines assume a 400 DPI mouse and 16:9 aspect ratio; if you run 21:9 ultrawide, drop the hipfire value by 0.10 to compensate for the extra peripheral pixels, which otherwise skew your flick distance calculations.
| Class | Recommended FOV | Engagement Range | Best For |
|---|---|---|---|
| Assault | 80-85 | Close | Trench clearing, objective pushes |
| Rifleman | 70-75 | Medium | Flexible play, all-round performance |
| Sniper | 60-65 | Long | Defensive positions, counter-sniping |
| Support | 70-80 | Medium | Suppression, holding chokepoints |
| Machine Gunner | 75-80 | Medium-Long | Area denial, defensive lines |
| Scout | 80-85 | Close-Medium | Flanking, reconnaissance |
| Medic | 70-75 | Medium | Frontline support, revives |
| Officer | 70-80 | Medium | Squad coordination, buffs |
| Flamethrower | 85-90 | Very Close | Bunker clearing, shock attacks |
Your FOV adjustment window is limited by the game's settings menu, so test different values in a live match rather than the practice range to see how they feel under real combat pressure. The 90° default feels sluggish when clearing tight interiors on maps like Château, while cranking it to 110° widens your peripheral vision for spotting flanking riflemen—but it also shrinks the on-screen target model, making mid-range headshots on moving targets noticeably harder. Since Entrenched's weapon sway and recoil patterns scale with your FOV multiplier, a value that feels stable on the firing range can throw off your muscle memory for the Kar98k's iron sight alignment once suppression and screen shake kick in during an actual push.
Crosshair Settings for Consistent Aim
Choosing the Right Crosshair Style
ENTRENCHED offers several crosshair options, and the one you pick affects how naturally you can align shots during fast-paced exchanges. The dot-style crosshair works best for bolt-action rifles because it gives you an unobstructed view of your target's head, while the cross-style crosshair helps with leading shots on moving targets when using automatic weapons. Players who struggle with tracking enemies often switch to a larger crosshair with more visual weight, even though it obscures more of the screen.
Color and Opacity Adjustments
The default white crosshair disappears against bright backgrounds like snow-covered maps or sunlit ridgelines, which is why most competitive players change the color to something that contrasts with the environment. Bright green or magenta are popular choices because they stand out against both dark trenches and bright skies. Adjusting opacity to around 80% keeps the crosshair visible without letting it block your view of distant enemies.
Crosshair Placement and Recoil Control
Your crosshair placement matters just as much as its appearance, because keeping it at head height while moving between positions reduces the adjustment needed when you spot an enemy. The recoil pattern of each weapon affects how quickly your crosshair returns to its original position, so spend time learning the rhythm of your preferred gun's kick before worrying about fine-tuning your settings. Players who master this timing land follow-up shots much faster than those who fight the recoil.
The table below compares the most common crosshair configurations, breaking down each reticle type by its impact on entrenched fov settings and recoil control. For instance, the default static dot excels at pinpoint precision during sustained fire, while a dynamic crosshair expands to visually telegraph your weapon's bloom, making it easier to time your trigger pulls during full-auto spray patterns. Choosing the right configuration here directly affects how effectively you can track targets while managing the weapon's kick, so the comparison highlights which reticle pairs best with specific entrenched classes and their typical engagement ranges.
| Crosshair Type | Best Weapon Class | Pros | Cons |
|---|---|---|---|
| Dot | Sniper, Rifleman | Clear target view | Hard to see on bright maps |
| Cross | Assault, Support | Good for leading shots | Can obscure small targets |
| Circle | Machine Gunner | Helps track moving targets | Large visual footprint |
| Custom Color | All classes | High visibility | Requires manual setup |
Your crosshair sensitivity multiplier doesn't operate in a vacuum—it scales proportionally with your FOV, so cranking your entrenched FOV from 90 to 110 effectively stretches the same mouse movement across a wider visual arc, making your crosshair feel slower per degree of turn. This is why competitive players who push their FOV higher for better peripheral vision in entrenched respawn modes often compensate by bumping the sensitivity multiplier up 10–15% to keep their flick shots and tracking consistent. Conversely, if you drop your FOV for more precise long-range engagements, the same multiplier will feel twitchy, so you'll need to dial it down—always re-test your aim in a custom match against moving targets before locking in a new combination.
How to Switch Classes in ENTRENCHED
Switching classes in ENTRENCHED is straightforward once you know where to look, but many new players miss the option because it is tucked into the respawn screen rather than the main menu. When you die, the respawn interface shows your current class at the bottom of the screen, and you can cycle through all nine available options before confirming your respawn. The game offers Rifleman, Assault, Medic, Sniper, Scout, Support, Officer, Flamethrower, and Machine Gunner, each with distinct weapons and abilities that suit different combat roles.
Your class choice should adapt to the match situation rather than staying locked throughout the entire game. If your team is struggling to break through a defensive line, switching to Flamethrower can clear out bunkers effectively, while a sudden need for long-range fire support might push you toward the Sniper class. The class selection menu also displays each class's loadout, so you can compare options before committing.
Here is the step-by-step process for switching classes: Open the pause menu (Esc on PC, Options on console) and navigate to the "Loadout" tab, then select "Class" to view the four available presets—Assault, Support, Recon, and Medic. Before confirming your swap, note that your entrenched FOV settings and crosshair placement carry over globally, but your current respawn timer resets, so time the switch to avoid wasting a spawn wave. To lock it in, highlight your desired class and press the confirm key (F on PC); the game will immediately queue the loadout change for your next respawn, which is especially useful mid-match when you need to counter an enemy sniper by swapping to Recon with a higher zoom scope.
-
Wait for the respawn timer to reach zero after dying.
-
Look for the class icon displayed near the bottom of the respawn screen.
-
Click or tap the icon to open the class selection wheel.
-
Scroll through the nine available classes and highlight the one you want.
-
Confirm your selection and respawn with the new class loadout.
The class switching cooldown is minimal, so you can adapt to changing circumstances without penalty, but you should avoid switching too frequently because each new class has different weapon handling that takes time to adjust to. For example, swapping from a Rifleman to a Machine Gunner mid-push requires re-acclimating to the MG42's heavy recoil and suppression mechanics, which can throw off your aim during a critical entrenched fov settings-dependent engagement. Since your field of view directly affects how you track enemies at range, a sudden weapon-handling shift can leave you vulnerable to flanking shots while you re-zero your crosshair placement.
ENTRENCHED Respawn Guide: Timing and Strategy
Understanding the Respawn Timer
The respawn timer in ENTRENCHED varies depending on the game mode and how many players are currently waiting to return to the battlefield. In Frontlines mode, the timer typically sits between 5 and 10 seconds, while Conquest mode can stretch that to 15 seconds during intense battles. The timer appears as a countdown on your screen, and you can use that waiting period to plan your next move rather than staring at the screen impatiently.
Spawn Point Selection
When the timer finishes, you get to choose your spawn point from the available options on the map. The game highlights squad spawns, captured objectives, and your team's main base, and each option carries different risks and rewards. Spawning at a forward objective gets you back into the action faster but puts you closer to enemy fire, while spawning at the base is safer but costs you valuable time traveling back to the front lines.
Using Respawn Time Effectively
The time between death and respawn is not wasted if you use it to analyze the match state. Check the scoreboard to see which objectives your team controls, look at your teammates' positions to identify weak points in the enemy defense, and decide which class will help the team most in the next engagement. Players who plan during the respawn timer consistently make better decisions than those who rush back into combat without a strategy.
Here are the key respawn considerations to keep in mind: your entrenched fov settings directly affect how quickly you can re-orient after dying, since a wider field of view (like 100–110) lets you scan more of the map for flanking enemies the instant you respawn, while a narrower fov (under 90) can leave you vulnerable to immediate ambushes near contested objectives. Pair this with your entrenched crosshair settings—a static, high-contrast reticle helps you snap onto targets faster when you re-engage, especially if you’re switching classes mid-match and need to reacquire your aim point. Time your respawn to align with your class switch, and use the spawn screen to mentally map your first push based on where your fov tells you the action is concentrated.
-
Squad spawns let you rejoin teammates quickly but may place you in active combat zones.
-
Objective spawns are best when your team is actively contesting a point.
-
Base spawns are safest but require a longer walk back to the action.
-
Class changes should happen before confirming your spawn, not after.
Your respawn decision-making speed improves with experience, so do not worry if your early choices are not optimal every time. In the first few rounds, you will likely waste a respawn window second-guessing whether your entrenched fov settings (typically 90–100) are causing you to miss peripheral enemy movements, or if your entrenched crosshair settings need a tighter reticle for mid-range engagements. Veterans instinctively use that 10-second countdown to pre-select their class loadout and adjust their FOV slider before the spawn screen even fades, turning a reactive scramble into a proactive routine.
Fine-Tuning Your Settings for Competitive Play
Testing Your Configuration
The best way to validate your ENTRENCHED FOV settings and crosshair configuration is to spend a few matches focusing specifically on how your aim feels rather than trying to win every engagement. Play a round as Rifleman with your new settings, then switch to Assault and compare how the same FOV value works across different weapon types. Keep a mental note of which settings feel natural and which ones force you to overcorrect your aim.
Adjusting for Map and Mode
Different maps in ENTRENCHED reward different settings, because open maps like Doiran demand better long-range visibility while close-quarters maps like Eisstadt favor wider FOV values. The map rotation means you cannot rely on a single configuration for every match, so learn to adjust your FOV and crosshair settings between rounds based on the upcoming map. Players who stick with one setting across all maps leave performance on the table.
Performance Considerations
Your FOV setting directly impacts your frame rate because higher values render more of the game world on screen. If you are playing on a lower-end PC, running 85 FOV might drop your frames below 60, which hurts your aim more than the wider view helps. The graphics settings guide covers performance optimization in detail, but the short version is that you should prioritize a stable frame rate over maximum FOV.
Community-Reported Best Practices
According to community reports from experienced players, the most successful configurations combine a 70-75 FOV with a colored dot crosshair for general play, then adjust from there based on class and map. Players who push into the 80+ FOV range typically play Assault or Flamethrower exclusively, while dedicated snipers rarely exceed 65. These are starting points rather than absolute rules, so treat them as a baseline and experiment from there.
The table below summarizes the recommended starting configuration, calibrated for a 24-inch monitor at 1080p with a 90–100° default FOV: set your FOV slider to 95, ADS sensitivity to 0.8, and leave the dynamic FOV scaling on for sprint and melee. This baseline preserves peripheral vision for flanking enemies in the trenches while keeping your crosshair stable during the high-recoil bursts of the MG42; from here, nudge the FOV down to 90 if you struggle with long-range sightlines on maps like Verdun Heights, or up to 100 if you favor close-quarters shotgunning in bunker clearances.
| Setting | Recommended Value | Notes |
|---|---|---|
| FOV | 70-75 | Adjust ±5 based on class |
| Crosshair | Dot, bright green | High contrast on all maps |
| Opacity | 80% | Visible without blocking view |
| Sensitivity | Default | Adjust after FOV changes |
Your aim consistency improves most when you stop tweaking settings and commit to practicing with a single configuration, because muscle memory develops faster when your setup stays stable. In Entrenched, this stability matters more than chasing the "perfect" number—swapping between a 70° and 90° FOV mid-match alters your perceived target size and recoil tracking, forcing your brain to re-calibrate every engagement. Players who lock their FOV and stick with it for 20+ matches report tighter crosshair placement on moving targets, whereas frequent tinkerers often blame their aim for what is actually a consistency problem tied to their own settings churn.
Frequently Asked Questions
What is the best FOV setting for ENTRENCHED?
The best ENTRENCHED FOV settings sit between 70 and 75 for most players, because this range balances peripheral awareness with target magnification. Assault players should try 80-85 for better close-quarters awareness, while snipers often prefer 60-65 for easier long-range shots. Test different values in live matches to find what feels comfortable.
How do I change my crosshair in ENTRENCHED?
Open the settings menu from the main screen and navigate to the crosshair section. You can choose between different crosshair styles, adjust the color to something that contrasts with map environments, and modify opacity to suit your preference. Bright green or magenta work best because they remain visible against most backgrounds.
How do I switch classes in ENTRENCHED?
When you die, the respawn screen displays your current class at the bottom. Click the class icon to open the selection wheel, then choose from the nine available classes including Rifleman, Assault, Medic, Sniper, Scout, Support, Officer, Flamethrower, and Machine Gunner. Confirm your choice before respawning to enter combat with the new loadout.
How long is the respawn timer in ENTRENCHED?
The respawn timer ranges from 5 to 15 seconds depending on the game mode. Frontlines mode typically has shorter timers around 5-10 seconds, while Conquest mode can extend to 15 seconds during intense battles. Use this waiting period to check the scoreboard, plan your next move, and decide if you need to switch classes.
Does FOV affect performance in ENTRENCHED?
Yes. Higher FOV renders more of the trench line, increasing GPU load and lowering your frame rate. If your FPS dips below 60 during Frontlines pushes, drop your FOV by 5–10 points to stabilize it. A stable 60 FPS beats a wider view for tracking targets.