
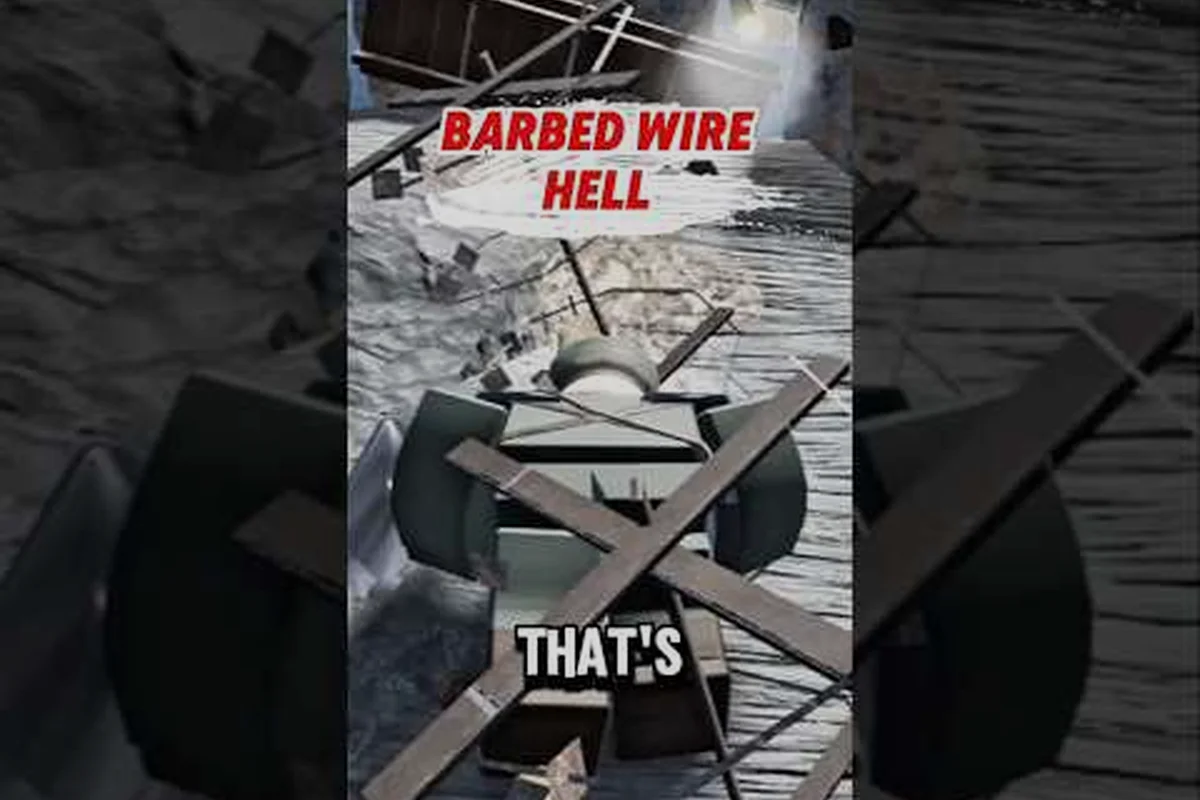
Barbed wire in ENTRENCHED is the difference between a trench line that holds for three minutes and one that collapses in thirty seconds. This single deployable shapes the entire flow of attack-and-defense on the Western Front maps, yet most players either spam it randomly or ignore it completely. Understanding how entrenched barbed wire interacts with movement, digging, and grenade physics lets you control the battlefield without firing a shot. The value here is immediate: proper wire placement buys your team time, forces the enemy into kill zones, and wins rounds that should have been lost. Whether you are defending a capture point in Frontlines or holding a flank in Conquest, the principles below will change how you build your trench network.
The Core Mechanics of Entrenched Barbed Wire
Every entrenched static defense follows the same build rules, but barbed wire has unique physics that set it apart from sandbags and metal shields. When you select the wire from the build menu, you place a single coil segment that spans roughly two meters of trench width. The game allows you to stack multiple segments side by side, which is where most of the strategic depth comes from. A single strand slows enemies for about half a second, but a double or triple layer can stop a charging squad cold while your machine gunner reloads.
The entrenched game physics governing wire are deceptively simple yet full of quirks that veterans exploit. Players cannot jump over wire, but they can walk through it at roughly 40 percent movement speed. Crawling under a single layer is possible, though the animation takes about two seconds and leaves the player completely vulnerable. What most players do not realize is that wire blocks grenade rolls — a fragmentation grenade thrown into a wire barrier will stop dead instead of bouncing into the trench behind it. This single mechanic turns wire into a defensive tool against explosives, not just infantry.
How Wire Interacts with Entrenched Digging
The entrenched digging system creates a natural tension with barbed wire placement. You can place wire on any dug surface, but the trench walls themselves block wire from extending across the top of your position. This means wire is most effective when placed at the bottom of a trench or across a communication trench entrance. Players who dig deeper trenches gain a defensive advantage because the wire sits lower, making it harder for attackers to shoot over it while they struggle through the coils.
Digging also allows you to create wire traps that are partially hidden. By digging a shallow depression and placing wire inside it, you create a visual illusion where the wire appears less threatening from a distance. Attackers who rush into the depression find themselves slowed at close range, exactly where your shotgun or SMG user wants them. Community reports from the Roblox Developer Forum suggest this technique has become increasingly common in competitive Frontlines matches since the v1.23 update added new map variations.
The Build Menu and Placement Rules
| Wire Feature | Value | Notes |
|---|---|---|
| Build time | 3 seconds | Interrupted if damaged |
| Health | 50 HP | Destroyed by 2 melee hits |
| Max stack | 3 layers | Each layer adds slow effect |
| Grenade interaction | Blocks rolls | Explosions still damage through |
| Melee interaction | Can be cut | Takes 4 seconds per layer |
The build menu places wire as a static defense that costs the same build points as sandbags but serves a completely different role. Sandbags block bullets, while wire blocks movement — the two complement each other perfectly when combined. A common defensive setup involves sandbags at the top of the trench lip to stop rifle fire, with wire layered at the bottom to catch anyone who makes it over the bags. This combination forces attackers to either stand still and shoot through the wire or commit to a slow, dangerous crawl.
Strategic Placement for Maximum Effectiveness
Placement is everything when it comes to entrenched barbed wire, and the difference between good and bad wire placement often decides the outcome of a match. The best positions are choke points where the map geometry already funnels attackers into a narrow corridor. Bridge crossings, trench intersections, and the approaches to capture points all benefit from wire layers. When you place wire at these locations, you multiply the effectiveness of your team's firepower because enemies must slow down exactly when they are most exposed.
The timing of wire placement matters just as much as the location. Placing wire too early gives the enemy time to destroy it with grenades or coordinate a melee rush. Placing it too late means the attackers have already established their push. The optimal moment is roughly ten seconds before the enemy wave reaches your position, which gives your team time to set up firing lanes while ensuring the wire is fresh and undamaged. This timing varies by map and game mode, so pay attention to the flow of each match.
Choke Points and Funnel Zones
| Map Area | Wire Value | Best Layer Count |
|---|---|---|
| Bridge crossing | High | 2 layers |
| Trench intersection | Critical | 3 layers |
| Capture point approach | High | 2 layers |
| Open field flank | Low | 1 layer |
| Communication trench | Medium | 2 layers |
The entrenched trenches on most maps create natural choke points that wire can exploit. A single trench intersection can be completely sealed with three layers of wire, forcing attackers to either go around through open ground or spend precious seconds cutting through. Players who understand the map rotation on ENTRENCHED's official Roblox page know that each map has specific choke points that change based on the current capture point. Learning these dynamic chokes is essential for effective wire placement.
Common Placement Mistakes
-
Spreading wire too thin — one layer across a wide area does almost nothing; concentrate layers at critical points instead.
-
Blocking your own retreat — wire slows your team just as much as the enemy, so always leave a gap for your own movement.
-
Ignoring grenade arcs — wire placed directly in front of a grenade launcher position will stop enemy grenades, but it will also stop your own team's grenades if they throw from behind.
-
Forgetting about melee — experienced attackers will cut through wire with melee weapons; always have a backup plan if your wire gets removed.
-
Placing wire in open fields — without trench walls to funnel movement, wire in open ground is easily bypassed by simply walking around the edges.
Breaching Tactics: How to Break Through Wire
Every defender needs to know how to place wire, but every attacker needs to know how to break it. The entrenched mechanics for breaching wire are straightforward, yet most players waste time and lives trying to brute-force their way through. The fastest method is melee cutting, which takes four seconds per layer but makes no noise that alerts distant defenders. A coordinated squad can have three players cutting simultaneously, removing a triple layer in under five seconds.
Grenades are the second option, though they work differently than most players expect. A fragmentation grenade thrown directly at wire will deal damage to the wire while also damaging anyone caught in the blast radius. However, the wire blocks the grenade's roll, meaning the explosion happens at the wire's location rather than deeper in the trench. This is actually useful for clearing wire, but it also telegraphs your position to every defender in the area. Smoke grenades do not damage wire but can cover your cutting animation from enemy fire.
The Role of Explosives and Tools
| Breach Method | Time to Clear | Risk Level | Best Use Case |
|---|---|---|---|
| Melee cutting | 4s per layer | Medium | Silent breach |
| Frag grenade | Instant | High | Clearing multiple layers |
| Rifle fire | 10+ shots | Low | Harassing defenders |
| Explosive barrel | Instant | Very High | Large area denial |
| Coordinated rush | 2-3s | Extreme | Overwhelming force |
The entrenched game physics around explosives create interesting breaching opportunities. Explosive barrels placed near wire will destroy multiple layers at once, but they also create a loud noise that alerts the entire enemy team. Players who want to breach quietly should stick with melee, while those who need speed should accept the noise trade-off. The best squads use a combination: one player throws a frag grenade to clear the first layer while two others cut through the remaining layers simultaneously.
Counter-Placement and Adaptation
Defenders who understand breach tactics will adapt their wire placement to counter common approaches. Placing wire in an L-shape rather than a straight line forces attackers to cut through two separate sections to create a path. Adding a second layer slightly offset from the first creates a gap that attackers must navigate carefully, slowing them even if they manage to cut the first layer. These advanced placements require more build points but pay off against experienced opponents.
Advanced Wire Strategies for Competitive Play
Once you master the basics of entrenched barbed wire, you can start using it in more creative ways that catch even veteran players off guard. One advanced technique involves placing wire inside a smoke cloud to create a hidden barrier. Attackers running through the smoke suddenly find themselves slowed, unable to see the wire until they are already caught in it. This works especially well in the attack-and-defense Frontlines mode where smoke usage is common.
Another strategy is the wire funnel, where defenders deliberately leave a gap in their wire to channel attackers into a specific kill zone. By placing wire across most of a trench but leaving a narrow opening, you control exactly where the enemy enters. A machine gunner positioned to cover that opening can mow down attackers as they funnel through, while the wire prevents them from spreading out to flank. This technique requires coordination but is devastating when executed properly.
Combining Wire with Other Static Defenses
The entrenched static defenses system rewards players who combine different elements rather than relying on a single type. Wire placed in front of sandbags creates a two-stage defense: attackers must first slow down in the wire, then deal with the sandbag cover while exposed. Metal shields placed behind wire give defenders protected firing positions where they can shoot through the gaps while staying safe from return fire. The combination of these elements creates layered defenses that are much harder to breach than any single component.
Map-Specific Wire Tactics
| Map | Best Wire Spot | Strategy |
|---|---|---|
| Eisstadt | Train station entrance | Triple layer + sandbag cover |
| Doiran | Hill approach | Wire funnel into MG position |
| Fortress | Main gate | Double layer + grenade trap |
| River crossing | Bridge midpoint | Two layers, offset placement |
Different maps require different wire strategies because the terrain and sight lines vary significantly. On Eisstadt, the train station entrance is a natural choke point where wire can completely seal off one approach. On Doiran, the hill approach benefits from a wire funnel that channels attackers into a machine gun position. Players who learn the ENTRENCHED conquest maps guide will understand how map geometry affects wire placement across the rotation.
Wire and Team Coordination
Barbed wire is a team tool, and its effectiveness multiplies when the whole squad understands how to use it. A single player placing wire without support will often see it destroyed within seconds, while a coordinated team can maintain a wire barrier for an entire round. Communication is key: defenders need to know where wire is placed so they do not accidentally block their own movement, and attackers need to coordinate breach attempts to avoid wasting grenades.
The entrenched game physics around wire create opportunities for coordinated plays that individual players cannot execute alone. One player can place wire to slow an enemy push while another throws a grenade into the slowed group, creating a devastating combo. A third player can use the distraction to flank around the side and catch the enemy from behind. These coordinated plays require practice but can turn the tide of a match when executed properly.
Building a Defensive Network
Building an effective defensive network requires planning before the round starts. The first step is identifying the most likely attack routes based on the current capture point and game mode. The second step is assigning players to cover each route with wire and supporting defenses. The third step is establishing a communication system so that defenders know when wire is destroyed and need replacement. Teams that follow this process consistently maintain stronger defenses than those who improvise.
Adapting to Enemy Tactics
Good teams adapt their wire placement based on how the enemy attacks. If the enemy consistently uses grenades to clear wire, place it in locations where grenades are less effective, such as around corners or in narrow trenches. If the enemy uses melee rushes, add more layers and position defenders to cover the wire from multiple angles. If the enemy tries to go around the wire entirely, extend your placement to cover alternative routes. The entrenched mechanics reward flexibility and observation over rigid adherence to a single strategy.
Frequently Asked Questions
How many layers of entrenched barbed wire should I place?
Two layers is the standard for most situations because it provides meaningful slow without excessive build cost. Three layers are worth it at critical choke points where you expect heavy enemy traffic, but remember that each layer takes four seconds to cut through, so three layers buy you twelve seconds of delay.
Can entrenched barbed wire be destroyed by explosions?
Yes, explosions damage wire and can destroy multiple layers at once. A direct grenade hit will destroy one layer, while an explosive barrel can clear three layers instantly. However, wire blocks grenade rolls, so the explosion must land directly on the wire rather than bouncing into it.
Does wire affect friendly players?
Yes, wire slows friendly players just as much as enemies. Always leave a gap in your wire placement for your own team to move through, and communicate wire locations to your squad so they do not accidentally run into it during a retreat.
What is the best way to breach entrenched barbed wire quickly?
Melee cutting is the fastest silent method at four seconds per layer, while grenades clear wire instantly but alert the enemy. A coordinated squad with three players cutting simultaneously can remove a triple layer in under five seconds, making this the best option for organized attacks.
Does entrenched barbed wire block bullets?
No, entrenched barbed wire does not block bullets or any projectile fire—it only slows enemy movement and stops grenade rolls. For bullet protection, rely on sandbags or metal shields. Combine wire for movement denial with hard cover for a complete defensive setup.